Following the initial setback of the campaign when the Allied airforce dispersed the concentration of German units at its jumpoff area, the German HQ activated the second company (2 platoons) and ordered an attack through the same Orange route of the first attempt.
This were not good news to the US players, who were caught with the wrong foot: this time the air interdiction was not used and they had left the Orange route only lightly guarded, expecting the Germans to try an alternative route (red or yellow). After the Germans announcing their intention to attack through Orange, infantry reinforcements were hastily thrown into the area, supported by an ATG of the reserve pool located at Le Neufbourg.
In Chain of Command terminology, scenario Orange 1 is a scenario type 2 (probe), in which the attacker is ordered to test the advanced enemy outpost and find a weak spot in the defensive line; victory is achieved either by placing one unit in the enemy's tactical edge or forcing a withdraw by falling force morale.
The German plan was simple: test both flanks (north and south) with an infantry platoon each. In the North this was supported by a off-table mortar section (directed with an FOO); in the south, the platoon was provided motor transport in the form of three Hanomags escorted by a Panther.
The US plan was designed to make the most efficient use of its limited assets. They put a small stopping force in the north protected by a trench and created a strong defensive position in the small station building in the south. The Americans also had a good dug out position for the ATG in the high ground in the north overlooking the valley with a very clear line of sight.
The patrol phase concluded with most of both sides' jump-off points close to their respective tactical edges due to the lack of covering features of the map. The Germans activated first and unsurprisingly went for a quick and aggressive deployment since the beginning. Three Hanomags, a Panther and grenadier infantry unit quickly emerged in the south, while in the north a couple of grenadier sections were also steadily moving forward.
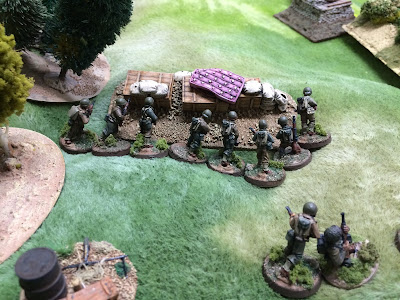
The speed of the game surprised me. The Americans reacted in the north placing the infantry in trenches and not soon enough a heavy fire exchange developed, effectively pinning the Germans in a dangerous open position. Casualties and shocks quickly accumulated and two German squads were routed.
Meanwhile in the southern flank, the Hanomags were moving at top speed supported by the Panther. The US ATG in the hill attempted several times to fire on the halftracks, narrowly missing a couple of times.
The remaining US infantry and bazooka team deployed in the station looking to fire on the Hanomags when close enough. The odds were 50/50 at this stage but goddess Fortune was today on the German side: two consecutive activations and a failed bazooka shot allowed two of the racing Hanomags to cross the US tactical edge at flat-out speed, achieving an automatic victory
The US forces in relatively good shape and high moral retreated in good order together with the ATG, that could be hooked to a its prime mover and offered the opportunity to take revenge in a next game.
 |
| The Bazooka moment |
 |
| "Photo Finish!" |


Another fairly quick game.
ReplyDeleteDark Blue on dark grey background makes reading links very difficult. I wonder if this is specific to my display?
ReplyDeleteNo, it's not you but bloddy Blogger. It has changed the settings for some reasons and I cannot change to the my previous colour palette based on light orange and grey. Working on that with the support guys
Delete