
I played today my first game with Lasalle, a small but very enjoyable scenario based on the Battle of Sabugal in Portugal in April 1811 (you can get the background by clicking on the previous link to Wikipedia), included in one of ths scenario bookelts of General de Brigade. After failing to breach Torres Vedras, Massena began retreating out of Portugal; Wellington sees the opportunity to cut Reunier's 2nd Corps and sent ahead the Light Division supported by cavalry elements, clashing nearby the town of Sabugal.
French order of battle
2nd Corps of the Army of Portugal
C-in-C: General Reynier (average)
(all battalions @4 stands)
- Brigade Merle:
- 4º Legere - 2 x Battalion/SK2
- Brigade Sarrut:
- 2º Legere - 3 x Battalion/SK2
- 36º Line - 3 x Battalion/SK1
- 1 Foot Arty – 2 bases
- Brigade Heudelet:
- 17º Ligero – 2 x Battalion/SK2
- 70º Línea – 2 x Battalion/SK2
- Brigade Arnaud:
- 47º Línea - 3 x Battalion/SK1
- Pierre Soult :
- Dragoons – 4 bases

British order of battle
C-in-C General Erskine (poor)

A. Light Division
- Brigade Beckwith:
- 43º Foot – 2 x Battalion (6 stands)/SK 2
- 3º Caçadores – 1 x Battalion/SK3
- 95º Rifles – 1 x Battalion/SK3
- Brigade Drummond:
- 52º Foot – 2 x Battalion (6 stands)/SK2
- Guthrie-Jones:
- 16º Light Dragoons (4 stands) - enter in turn 5 through "A" entry point
- Arentschildt: 1º Hussars KGL (6 stands/Elite) - enter through "A" entry point if fog lifts
Arrive through "B" entry point in march-column formation if fog lifts
- 5º Foot – 1 x Battalion (6 stands)/SK2
- 83º Foot – 1 x Battalion /SK2
- 88º Foot – 1 x Battalion /SK2
- 94º Foot – 1 x Battalion /SK2
- 1 RHA Battery (3 Stands)
- Game length is 15 turns but can be extended by up to extra 6 through die roll
- Foggy weather: starting in turn 8, British player throw 1D6 to check weather changes; on a "6" fog lifts, otherwise in turn 14.
French VC:
- Marginal: destroy 3 battalions of the Light Division and move 8 French battalions off table through exit point "C"
- Decisive: destroy 3 battalions of the Light Division and move all the Corps infantry units off table through exit point "C"
- Marginal: avoid less than 3 battalions of the Light Division being destroyed
- Decisive: avoid less than 3 battalions of the Light Division being destroyed and the French moving off-table less than 5 battalions
Map and deployment
A simple 8' x 5' map depicting an elevated ridge and some farm land enclosures covering the French line of defense. Enclosures provide cover to defenders and any charge crossing the ridge is condered "uphill".

The French deployed Brigade Merle facing the first British line and behind and from north to south, brigades Arnaud, Heudelet and Sarrut with the cavalry next to Heudelet.


Battle development
The first initial turns saw the French Brigade Merle and the British Ligh Division exchanging long range musketry fire. The French Brigades Audelet and Sarrut were ordered to move off table. Heudelet played aggresively initiating a move to deploy the infantry in a line of fire facing south with h the French artillery and cavalry units in support.

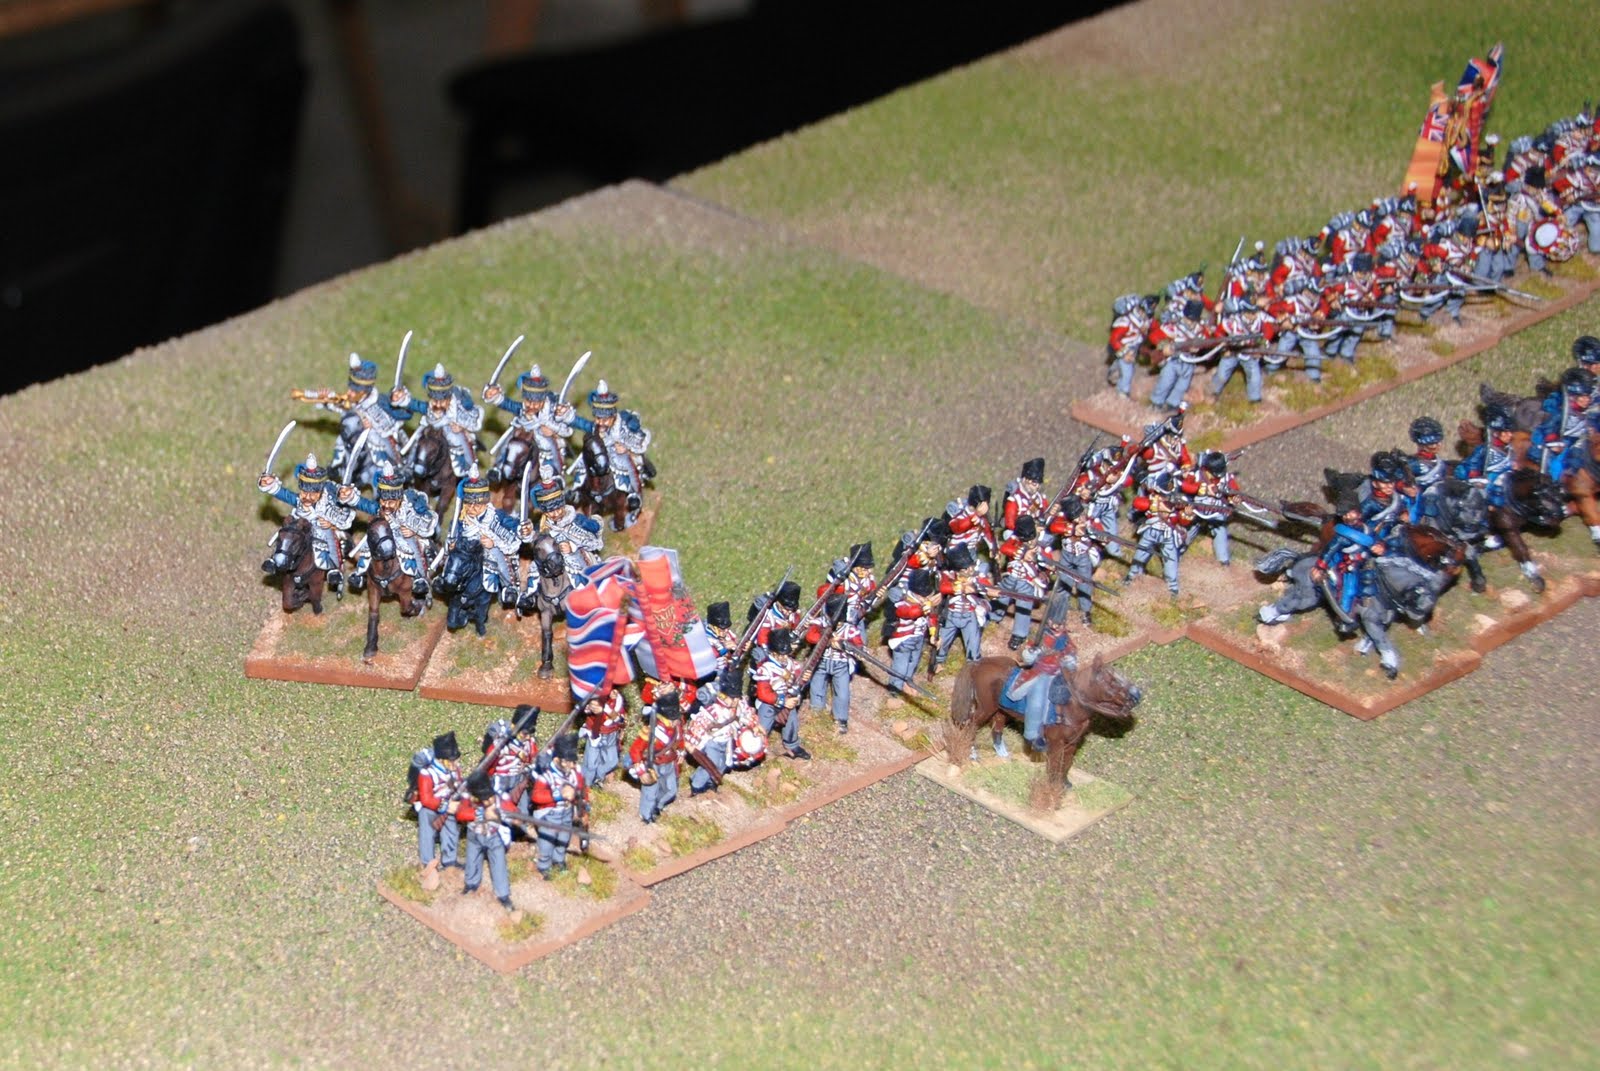
The flank of the British line was seriously threatend when the Line Chasseurs charged over the gallant Caçadores; but showing unrivalled sange froid formed a square with the enemy already on them and resisted two consecutives attacks, finally rejecting the French cavalry attack that fell back with 2 disruptions.

This was a key moment in the battle, as it provided some breath to the British player while the first reinforcements started to move on the southern edge of the game table (2 infantry and the Light Dragoons units), rebalancing his initial disadvantage in terms of troops.

Fog lifted a few turns later and serious British reinforcements started to pour now on the table, both in the southern (a powerful KGL cavalary unit)...
... and the western edges of the battlefield

Any hope of victory for the French had evaporated by now, and at best it was going to achieve a draw. The British cavalry units posed a clear threat to the French artillery, that had to limber up after firing just a couple of times in the game, being strongly pursued by the KGL.

The French brigades leaving the table accelerated their pace...

...before being cut off by Pincton's British column, now reaching the summit of the ridge.

In the south, Merle and Sarrut were sacrificed to cover the retreat of the rest of the Corps, suffering heavy casualties from the combined fire of the British musketry and rifles and the cavalry charges.

The game finally ended in turn 15 and a was called a draw: the French lost 3 infantry battalions and the cavalry unit but 8 infantry battalions exit the battlefield; the British got not a single battalion lost but could not block the French infantry battalions leaving the table.
After action rumblings
All in all, a good impression of Lasalle in this my first full game. The game flows really nice and fast, having invested just a couple of hours in this scenario. Our impression is generally positive on the rules although the command system seems rather weak, specially after reading General de Brigade. I have not commented in the post, but we have today experimented with adding the GdB command system to Lasalle, but we need to work the fine details before jumping into it.
No comments:
Post a Comment